

We’ll be the first to admit that there are a lot of reasons to absolutely love the summer months: vacations, warm weather, time off work, fireworks, pool and beach days, sun tans, watermelon, and of course, lots and lots of gorgeous flowers! It’s one of the reasons we are completely smitten with summer. With florals blooming, budding, and thriving, the season of sun brings all kinds of color to the outdoors.
But what about the indoors? Wouldn’t it be nice to bring all those blooming flowers, gorgeous gardens, and beautiful buds into your home? To color each room in the house with nature’s finest work? Of course, you can gather and arrange a bouquet or two, but what about something that lasts a little longer? Something that will never wilt or fade
We know it may sound too good to be true, but with vinyl flower decals from Urbanwalls, you bring those gorgeous flowers inside, transforming the walls of your home as you build and create blooming bouquets of your own design. Blooming bouquets that will last the entire season—and even longer if you wish!

Choosing a Design for Your Vinyl Flower Decals
There is no “one way” to arrange our flower wall decals. You’ve got a style all your own, so let it shine through! How you map out and plan your design may depend on the size of the decals you choose or the space in which you’re installing.
Need a starting point or a few helpful hints and ideas? Even the best “gardeners” need a little inspiration sometimes! To get your stylistic juices flowing, we’ve put together a few different techniques for sprucing up your walls for the summer using our removable, flower wall decals.
Spaced
All of our flower decals look great spaced throughout a wall. The lovely thing about using flowers to decorate is that there is rarely an incorrect way to situate them throughout your space. For this look, you don’t have to worry about even or measured spacing. You can simply tack the flowers to the wall in a manner that is pleasing to the eye, overlapping some in larger clusters, while leaving smaller blooms out to offset the design. The key is to have negative space throughout the design, allowing a feeling of movement throughout the space! Think of it a bit like freestyling.

Clustered
With freestanding wall decals, you can layer each flower decal, building and arranging however you wish in order to create a gorgeous bouquet. Consider yourself the florist! You can layer each flower decal together into one giant focal point, or you can create several smaller clusters, or “bouquets”, throughout the space. Don’t be afraid to let your bouquet(s) be asymmetrical. In our opinion, that’s how they look best. The rule to remember when it comes to creating your unique design is that there really aren’t any rules. Make it whatever you want it to be!

Cascading
Instead of a clustered look, why not try a cascading one? Arranging your blooms closely, layer the decals on top of one another, overlapping in strategic areas to create a cascading waterfall of florals. Like all flower art, there’s not necessarily a right or wrong, or even a specific shape you must achieve. Work around existing décor and furniture to give yourself an everlasting arrangement, the perfect summertime or year-round focal point for a reading nook or favorite corner.

Small Bouquets
If you’ve chosen a flower decal pack with smaller-sized blooms and foliage, you may want to consider grouping them in small, delicate bouquets. In fact, covering an entire wall in baby bouquets might be the simplest thing you’ll do all week! Clustering the flowers together in small bunches throughout a wall gives your space a wallpapered look—with absolutely none of the hassle. We suggest pairing at least one leaf alongside every flower cluster to offset each bouquet and to work a little greenery into the design.
This method is about your preferences! You get to shape each cluster, layering the blooms together in the ways you like best. Although it may seem scary, we recommend cutting a few bouquets along one side to be placed against windowsills and trim for a more polished and complete look. Installation is super simple, super casual…but the end results? Anything but.

Flowing Garland
You may have thought creating a garland was outside of your skill set, something to be left to a florist. Well today, you are a wall florist and you’ve totally got this!
To begin, we recommend using a picture of a garland for reference (maybe something you find on Pinterest) to help you mimic the shape. Everyone needs a little outside boost of inspiration sometimes! After you’ve decided on the shape and spacing, use pieces of painter’s tape as a guide so you can plainly see where you want the flowers to start, curve, and finish.
Remember how we said you were a florist? Cluster the leaves at the garland’s ends and curve points, like a pro. Think of it as adding the finishing touches. The key to this design is lots of layering, so don’t be shy about overlapping the decals!

How to Install Vinyl Flower Decals
Now that you’ve settled on a design, you may be wondering, just how do you install our removable decals? We’ve broken it down for you in three easy to follow steps.
1) Arrange
Pick a wall, any wall—in any room of the house! After you’ve chosen the wall (or walls) that you’d like to use, arrange the blooms in the space by taping them with painter’s or masking tape. This allows you to rearrange your design before securing it to the wall. You know, in case you change your mind (let’s be honest, it happens to all of us).
If you’re looking for uniformity with your design, we highly suggest breaking out a measuring tape and making pencil marks to use as a guide.
Want a pro tip? Don’t be afraid to cut the decals! We know it can seem horrifying to cut your brand-new decals, but the results are well worth it. The idea is to arrange these “cut” decals around baseboards and windowsills. By cutting them in half (or less than half) it gives your design a more natural look, as if the pattern is carrying on.
After one bloom is taped to the wall, choose another, layering and spacing as you wish until your design is complete.
2) Peel
Are you happy with your design? Can you almost imagine that you’re smelling the bouquet’s sweet perfume? If the answer is yes, it’s time to peel the adhesive back from your decals. (If the answer is no, go back in and rearrange until you’re happy with your completed look!)
Keeping the bloom tacked to the wall, lift the flower decal so you can see the back. Starting in a corner, slowly peel the back from the decal to expose the adhesive. As you pull, stick and smooth the decal to the wall, slowly working your way to the bottom as you go.
Now peel the front transfer paper from the flowers, exposing their true colors! Remember to remove the paper slowly and at a 45-degree angle. It may even help to remove it in strips or sections.
3) Smooth
Using a credit card or squeegee, smooth any bubbles out of your blooming bouquet. Got a stubborn one that won’t disappear? You can poke a little hole in the bubble and press it down in order to get it to lay flat.
That’s it! You’re all finished! Now go get a sweet tea and relax in a swirl of blossoms! I guess we should have added a fourth step labeled “Relax and Admire”, huh?

Our Vinyl Flower Decals
Now, let’s choose which flower decal pack is right for you!
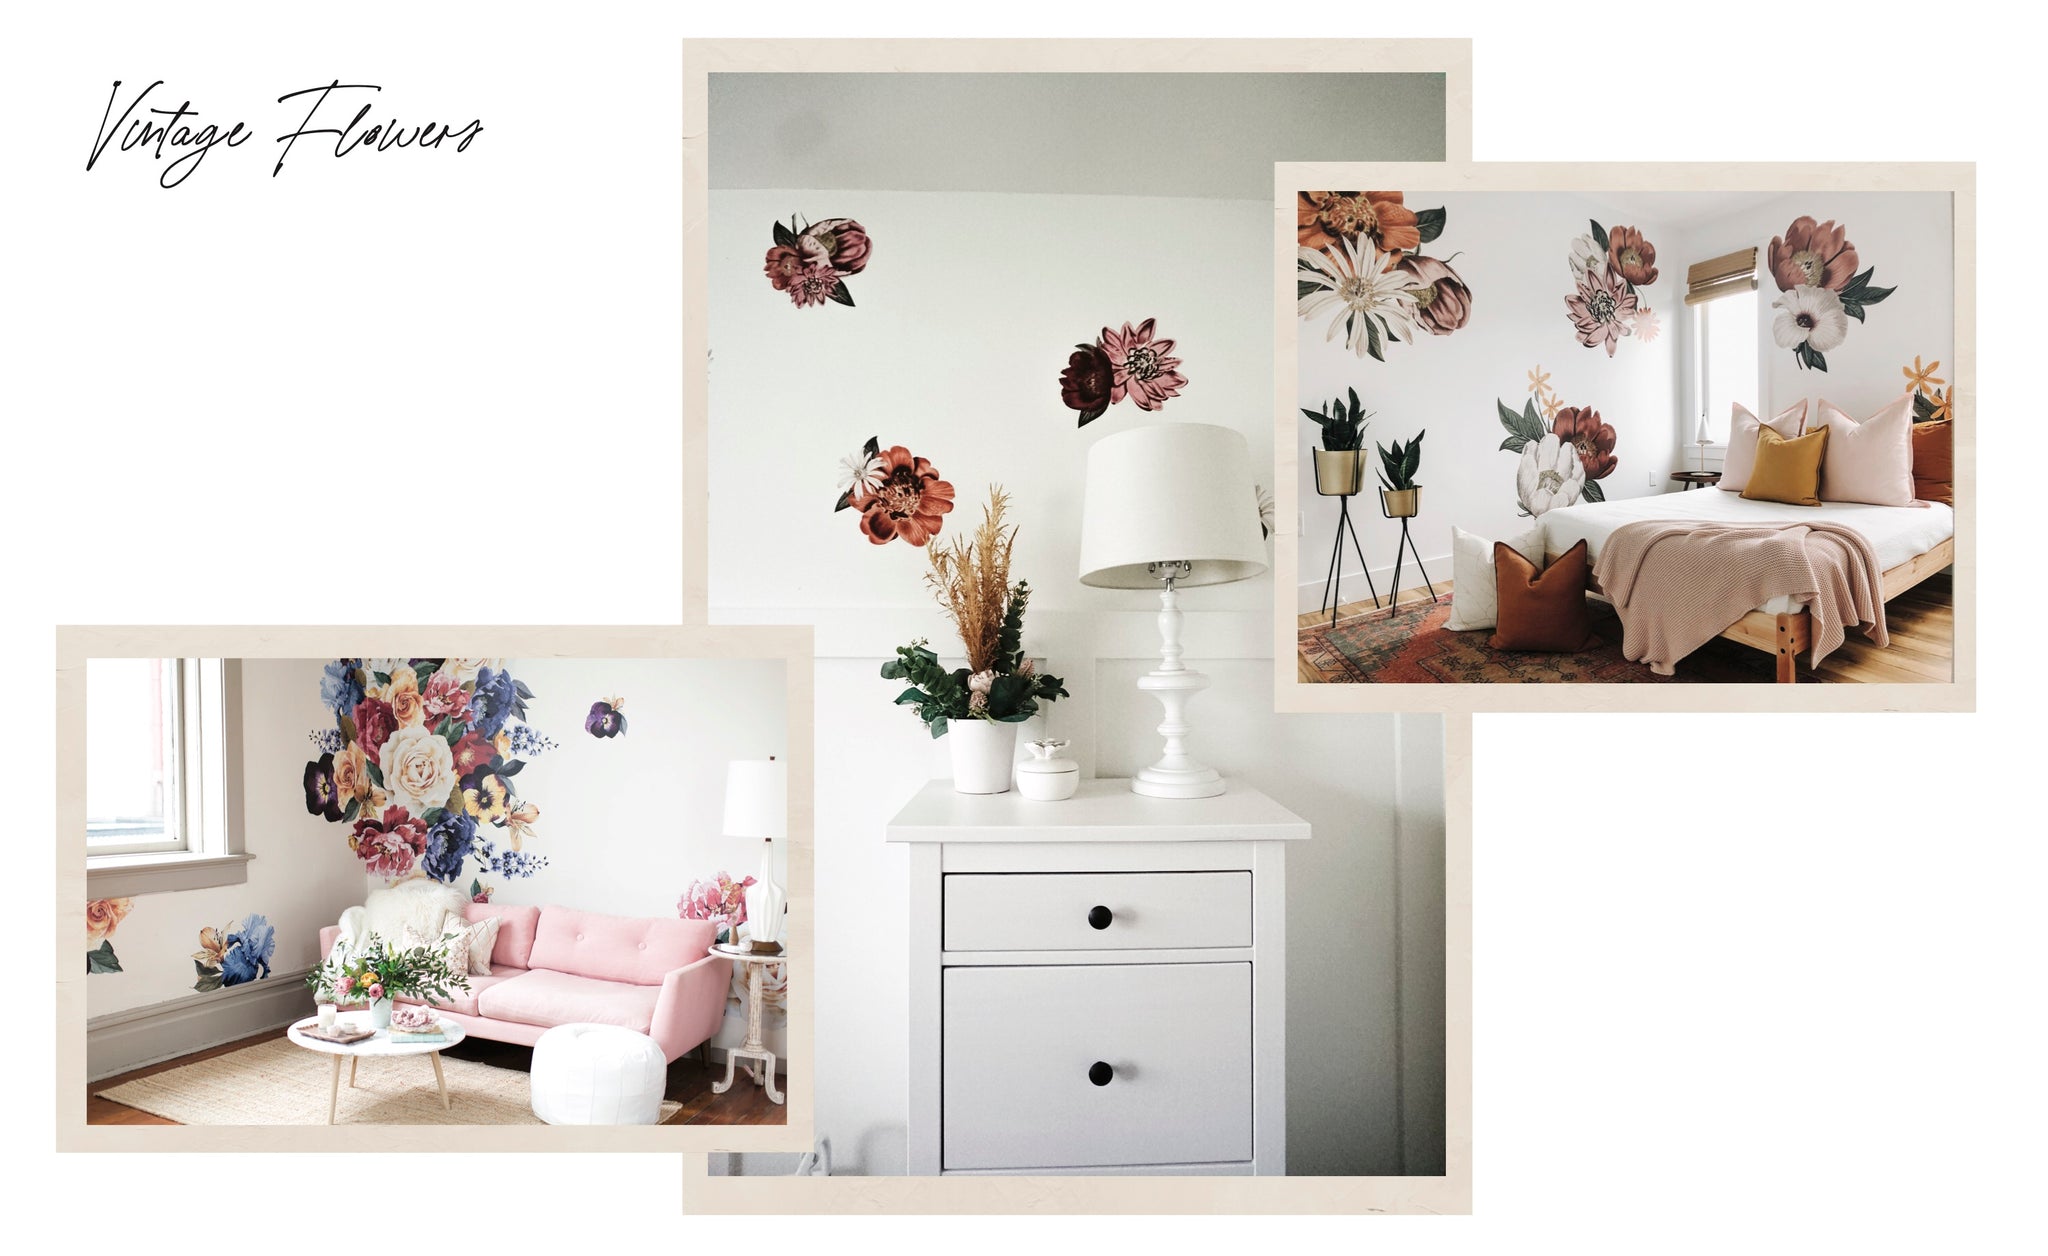
Vintage Flowers
Who doesn’t love a throwback? From our Vintage Floral wall decals to our popular Eden Floral wall decals, the packs in this category are as classic as they are gorgeous. Some, like our Crimson Dahlia wall decal, give the impression of having been lifted straight from a naturalist’s field journal. Varying in size and style, find the vintage-inspired design that speaks to you—and then personalize it to make it all your own!
- Vintage Floral Wall Decals
- Black and White Flowers
- Eden Floral Wall Decals
- Mini Eden Floral Wall Decals
- Secret Meadow Decals
- Glossy Leaved Pittosporum Wall Decal
- Pinnated Rudbeckia Wall Decal
- Crimson Dahlia Wall Decal
Peonies
Peonies—they’re everyone’s favorite flower, aren’t they? Unfortunately, peonies have the shortest blooming season around! It’s so difficult to keep a bouquet of peonies in a vase for very long.
Luckily, we have created a solution for that unfortunate problem. After all, no one should ever be without their favorite flower! With ten peony decal packs, you can easily keep your favorite flower around all year. Choose from a multitude of colors and styles to match your tastes or your existing home décor. Some of our peony packs were created with a photographed look while others give off an illustrated impression, both styles stunning in detail.
- Blushing Peony Wall Decals
- Peony Wall Decals
- White Peony Wall Decals
- Midnight Peony Wall Decals
- Royal Bliss Peony Wall Decals
- Beautiful Peony Garden Flower Wall Decals
- Summer Daze Peony Wall Decals
- Everlasting Peony Wall Decals
- Mountain Tree Peony Decal
- Chinese Peony Wall Decal

Garden Flowers
In our Garden Flower decal category, you will find decals that perhaps look a bit more lifelike. Many of these flower decals were created from actual photographs taken by our team. With macro detailing, these decals deliver a stunning and realistic rendering for your walls. Additionally, we’ve included decal packs like our Victoria Florals, Lilacs, and Daisies that would be commonly found in a backyard garden, but have a more illustrated feel, complete with gorgeous accuracy and detail.
- Soft Pink Garden Flower Wall Decals
- Mixed Pink Garden Flower Wall Decals
- Mini Garden Flower Wall Decals
- Lavender and Yellow Garden Flower Wall Decals
- Lilac Blooms Wall Decals
- Daisy Wall Decals
- Victoria Floral Wall Decals
- Mini Victoria Floral Wall Decals
- Briar Rose Wall Decals

Graphic & Watercolor Flowers
If you’re looking for a more artistic look for your room or home, we recommend perusing our Graphic and Watercolor Flower decals. Many of these decals were originally hand-painted by in-house artists before becoming removable decals! From elegant, watercolor florals that seem to bloom across your walls to bright, illustrated flowers perfect for children’s bedrooms, playrooms, and nurseries, you can easily add a work of art and a sunny flower garden into your home.
- Water and Ink Floral Wall Decals
- Pink Watercolor Flower Wall Decals
- Faded Pink Graphic Flower Wall Decals
- Pink/Teal/Coral Graphic Flower Wall Decals
- Coral/Teal/Peach Graphic Flower Wall Decals
- Pink and White Graphic Flowers
- Lavender and Lilac Graphic Flower Wall Decals
- Soft Blush Floral Wall Decals
- Superbloom Floral Wall Decals

No matter what you select, the impact to your home will be refreshing and unique!

How Do Vinyl Flower Decals Work?
At Urbanwalls, we specialize in creating affordable, vinyl wall decals that are both easy to apply and easy to remove. Yes, that’s right! All of our products are completely removable without doing any damage to your walls or surfaces.
Which means, you can make your walls bloom with vinyl flower decals for as long as you like—or for the summer months only.
You can space and place our flower decals anywhere that there’s a smooth, flat surface—which means you can apply them on walls, cabinets, dressers, laptops, and in those tricky areas where wallpaper just isn’t an option. Because the wall decals are freestanding, the ways you can arrange them are limitless, making it easy to achieve a truly original design completely unique to your home.
Like we mentioned, our removable wall decals are freestanding, which allows you to create any design you please. Layer, space, and create the garden, bouquet, or pattern of your dreams! You have ultimate control and our wall decals give you ultimate flexibility.
So, let’s talk about choosing a design that’s right for your room!


