Transforming your space with stunning wall decor is an exciting journey, and we’re here to make sure you have all the tools you need for a successful installation. From the simplest peel-and-stick decals to intricate floral designs and full wallpaper installations, we’ve got you covered. Let’s dive into the ultimate checklist to set you up for success!
Prepping Your Walls
Before you even think about sticking anything to your walls, it’s crucial to prepare the surface. Here’s the first and most important step:
Clean the Walls
- Damp Cloth: Always start with a damp cloth to wipe down your walls. Removing dust and debris helps avoid bumps and air bubbles, ensuring your wall decor looks flawless and lasts longer.

Wall Decals: Quick and Easy Installations
Peel and Stick
The easiest way to transform your room is with our peel-and-stick decals. No tools needed, just your hands!

- Your Hands: Simply peel the sticker off the backing and press it onto the wall. Use your hand to smooth out any bubbles and ensure it sticks well.
For the Type-A Personalities
If you like your decals to be perfectly aligned and symmetrical, here’s what you’ll need:
- Painters Tape: For temporary placement.
- Scissors: To cut out individual decals.
- Level: To make sure everything is straight.
- Tape Measure: For precise spacing.
- Pencil: To make faint marks for placement.

Steps:
- Cut out each decal.
- Use a tape measure and pencil to map out your placement.
- Use painters tape to temporarily place decals on the wall.
- Once happy with the layout, peel the backing off and stick the decals on the wall.
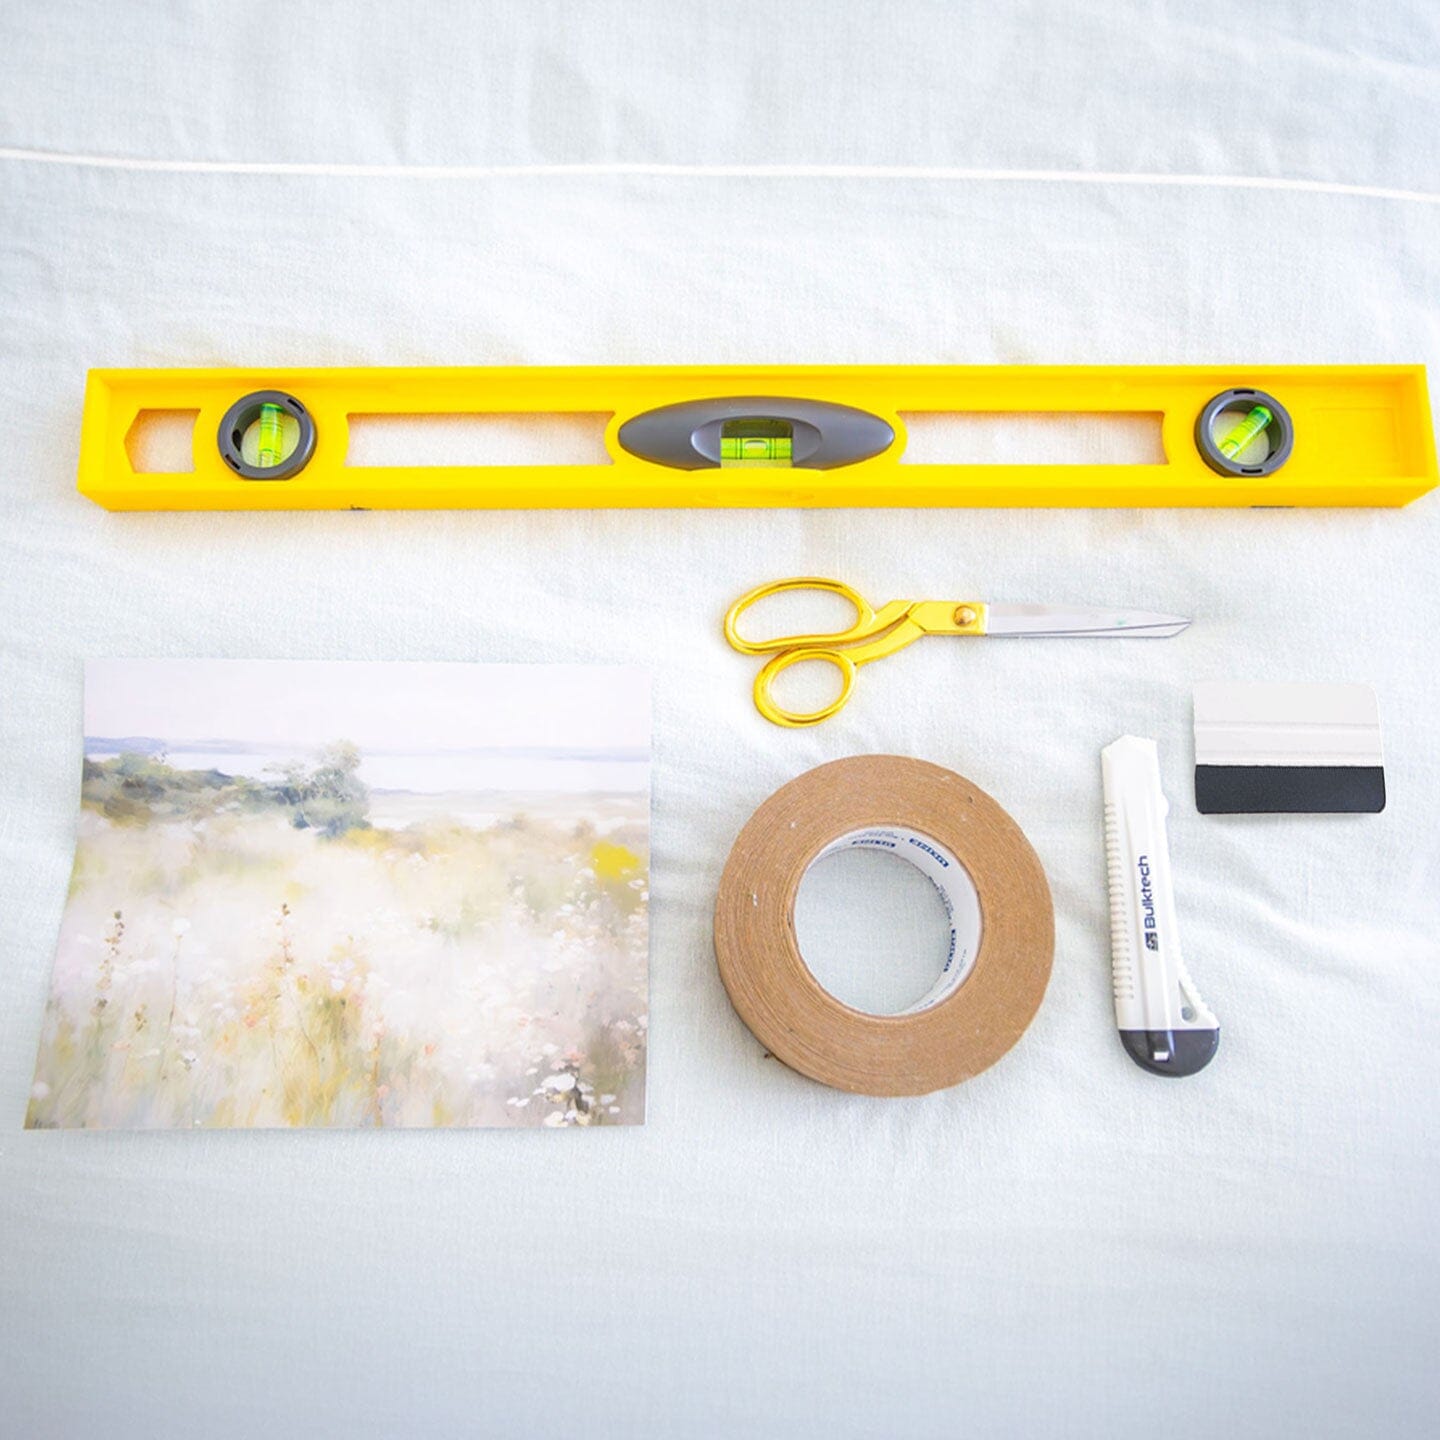
Floral and Layered Decal Installations
For those who love to unleash their creativity and create a unique masterpiece, here’s your toolkit:
- Box Cutter: For cutting decals and trimming edges.
- Painters Tape: For temporary placement.
- Squeegee: To smooth out decals and remove bubbles.
- Scissors: For cutting out individual decals.
- Smartphone: To snap a reference photo of your layout.

Join us as we transform a blank wall into a blossoming garden with our full floral wall decal installation.
Steps:
- Cut out each decal, being careful not to cut the design itself.
- Organize your decals into piles of large and small pieces.
- Use painters tape to temporarily place larger decals first, creating your design.
- Once satisfied, take a photo for reference.
- Peel the backing off and stick the decals on the wall, layering as you go.
- Use a squeegee to smooth out bubbles and a box cutter to trim excess at baseboards or crown molding.

Wallpaper Installation
For a seamless and stylish wallpaper application, these are your go-to tools:
- Squeegee: To smooth out panels and remove air bubbles.
- Box Cutter: To trim excess wallpaper.
- Flat Head Screwdriver: For removing switch plates and outlet covers.
- Level: To ensure your panels are straight.
- Painters Tape: For marking straight lines.

Steps:
- Measure about 20-21 inches into the wall from where you will start, depending on the amount of bleed you are allowing.
- Use painters tape to create a straight vertical line along the height of the wall. This will serve as a guide for your first panel.
- With a level, ensure the painters tape is perfectly straight.
- Line up the right side of your first wallpaper panel with the painters tape to ensure it is straight. This will set you up for success for the remaining panels.
- Use the squeegee to smooth out each panel, working from the center outwards.
- Firmly press the wallpaper where it meets baseboards and trim off the excess with a box cutter, using the squeegee as a guide to keep your cuts straight.
- If your panel goes over a light switch or electrical outlet, use a flat head screwdriver to remove the cover plate. Carefully cut out the space for the switch or outlet with a box cutter, allowing it to poke through.

Removing Decals and Wallpaper
When it’s time for a change, removing your wall decor is a breeze:
Hair Dryer
- Hair Dryer: Use it to apply heat and loosen the adhesive. Slowly and carefully peel back the wall decal or wallpaper panel.

Interested in discovering how simple the removal process can be? View our removal video HERE!
Other Handy Tools
While the essentials are covered, here are a few extra tools that might come in handy:
- Straight Edge: For making precise cuts.
- Craft Knife: For intricate trimming.
- Chalk Line: For marking straight lines on the wall.
Conclusion
Transforming your walls with our beautiful decals, wallpapers, and murals can be a fun and rewarding project. Whether you’re a minimalist who loves peel-and-stick ease or a creative DIYer who enjoys layering florals, having the right tools makes all the difference. Ready to start your decorating adventure? Grab your toolkit and let’s make your walls a stunning reflection of your personality! Need personalized advice or help choosing the right products? Reach out to us today!


