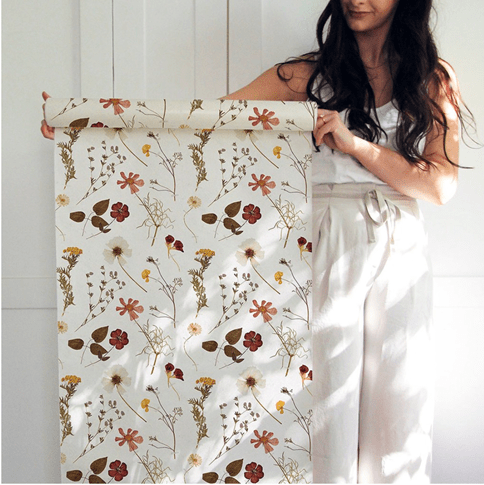
If there’s a room in your home that feels as if it’s missing something, then a wallpaper may be just the secret ingredient you’re looking for. Whether you’re updating a bedroom, kitchen, living room, or breakfast nook - wallpaper is a powerful way to change up a space in a way that makes it a reflection of you and your decor style. However, we also know wallpaper can be intimidating, which is why we’re so proud of our removable peel-and-stick wallpaper. You get all the perks of regular wallpaper with an easier install and future removal. (Take a look at our complete wallpaper collection for ideas for your space!)
In this guide, we’ll walk you through four phases of wallpaper installation - from solidifying a vision to final touches that make all the difference. Plus, we’ll share some tips that we’ve gained over the years to make your wallpaper look smooth and perfectly professional
Phase 1: Solidify Your Vision!
- Use the Virtual Design Assistant
We’re so excited to now offer our Virtual Design Assistant. For the first time, you can upload a photo of your space, select a decal or wallpaper of your choosing - and see what it will look like in your home. This makes it easier for you to experiment with different designs and textures - who knows, maybe you’ll be surprised at what you love most!
- Watch Video Tutorials
If you take a look at our YouTube, we feature a glimpse at the process of installing wallpaper. From measuring space to laying out the designs, you’ll get an inside look at tips and tricks, and the final results. Don’t forget to subscribe!
Phase 2: Prep & Plan
- Gather Materials
Depending on the design you’re installing, you’ll likely need a few materials. A cleaning cloth, pair of scissors, masking tape and an old credit card are good things to have handy. You may also want to have measuring tape nearby.
- Prep the Surface
To put your design in the best position to look as professional as possible, clean the surface. Wiping down the walls with a clean cloth will ensure the adhesive sticks to the walls with a smooth finish.
- Lay Out Panels
Before you begin, we recommend laying out all your panels to make sure they’re facing the same direction (note: panels are only installed vertically). We also suggest planning where you want to put your first panel - we generally recommend starting in a corner if the mural is covering an entire wall.
Pro tip: Keep in mind you should allow an inch or so of overlap onto the ceiling. Often, the lines of a ceiling aren’t even so this step will ensure gapping between the wallpaper and ceiling won’t be an issue.
Phase 3: Execute!

- Lay the Panel on the Surface
Place the first panel in the position you want and peel the adhesive back from the top (12 to 24 inches). Using the exposed adhesive, tack the panel into place before really rubbing it in for a “permanent” stick. Then, step back a few feet to make sure it’s in the perfect spot before peeling the rest of the backing at a 45 degree angle - and stick it to the surface as you go.
- Use a Credit Card/Plastic Scraper
Do you see little bubbles forming? Don’t worry! With a plastic scraper (credit card or squeegee), smooth the panel to the wall. This will take care of that and give you a nice, professional finish. Then, repeat until all the panels are installed!
Phase 4: Finishing touches + Do’s and Don’ts
- Don’t - Forget to Cut the Edges
Now that everything is installed, you’ll want to even out the ceiling. To do this, grab an exacto knife and cut the portion of the panel that overlapped onto your ceiling and/or baseboards. Allow the natural line of the ceiling or baseboard to dictate where you cut.
Pro tip: For the best longevity for your wallpaper, keep the room climate controlled.
- Do - Ask for Help!
Overall, these steps will be alot easier if you have an extra set of hands to help you during the installation. Turn on some good music and make it fun!
- Do - Download our Wallpaper Calculator
If you need help figuring out how much wallpaper you need, take a look at our wallpaper calculator. It’s a four step process that will make sure you have enough material to cover your wall space. You don’t want to go through this whole process and realize you need more wallpaper -trust us!
6 Removable Wallpaper Ideas - Bedrooms, Kitchens, Bathrooms, and More!
Marigold Wallpaper
Get the look: Marigold Wallpaper.
Desert Rose Wallpaper
Get the look: Desert Rose Wallpaper.
Scalloped Stucco Wallpaper
Get the look: Scalloped Stucco Wallpaper.
Primrose Wallpaper
Get the look: Primrose Wallpaper.
Watercolor Wildflowers Wallpaper
Get the look: Watercolor Wildflowers Wallpaper.
Magnolia Blooms Wallpaper
Get the look: Magnolia Blooms Wallpaper.
For more wallpaper ideas, check out this list of wall decor ideas for a girl’s bedroom, a boy’s bedroom, and other wall mural ideas!


